Add Device

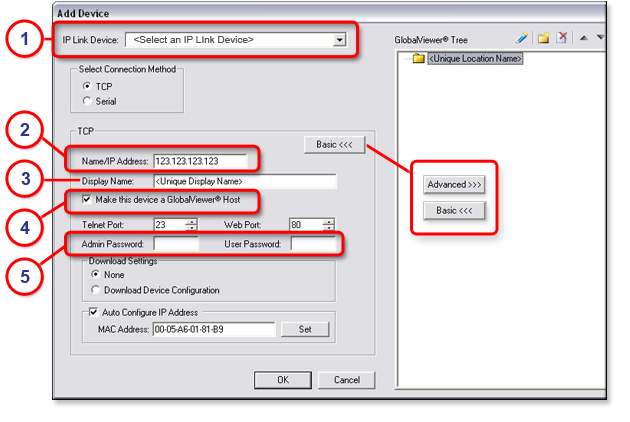
Use the Add Device option to add devices to your AV network configuration.  After adding a device, be sure to save the GC project file.
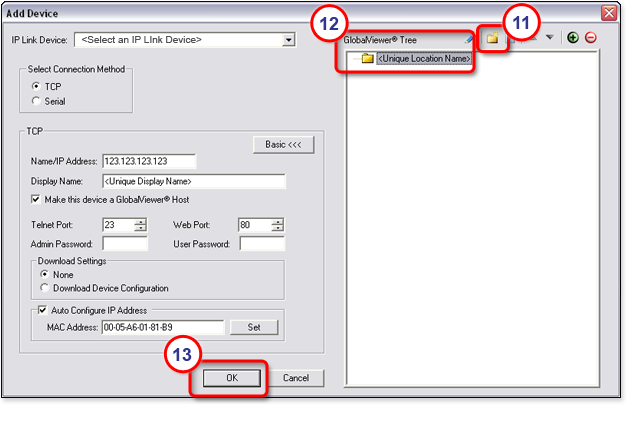
Adding a Device

To launch the Add Device dialog box:

From the Edit menu, select Add Device.

- or -

Click the Add Device icon on the toolbar.

- or -

In the Start Options dialog box, select Create a Project.

Follow the prompts until the Add Device dialog box opens.

  1. In the Add Device dialog box, select a device from the IP Link® Device drop-down list.

  2. In the Name/IP Address field, enter an IP address for the device or leave the default address.

  3. In the Display Name field, enter a unique display name to identify the device.

  4. Click Make this device a GlobalViewer® Host if desired.

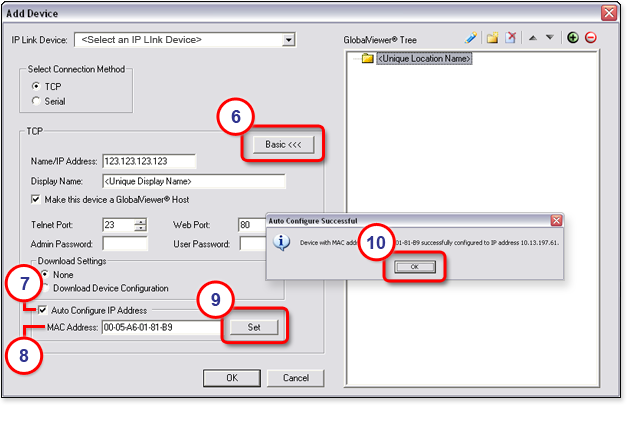
Note:  A GlobalViewer host is a device that launches the GlobalViewer graphical user interface if its IP address is accessed in an Internet browser.  A device that is not designated as a GlobalViewer host can be monitored and controlled from any GlobalViewer host device on the same network.

  1. If the device you are adding is password-protected, enter the appropriate administrator and user passwords in the associated Admin Password and User Password fields.

  1. Click the Advanced button.

  2. Select the Auto Configure IP Address check box.

  3. Enter the MAC address of the device (found on a label on the rear of the device).

  4. Click Set.  The Auto Configure Successful dialog box opens.

  5. In the dialog box, click OK.

  1. In the Add Device dialog box, click the New Location icon in the GlobalViewer® Tree section.

  2. Enter a unique location name for the new folder and keep the new location folder selected.

  3. Click OK.  The new device is added under the new location folder and the Add Device dialog box closes.

The other advanced options (shown in the illustration above) include:

  • Telnet Port - Default is Port 23.  Select a different port number to increase the security level of this device on the network.

  • Web Port - Default is Port 80.  Select a different port number to increase the security level of this device on the network.

  • Admin Password - Enter an administrator-level password if the device has an administrator password. Otherwise, GC will not be able to communicate with the device.

  • User Password - Enter a user-level password if the device has a user password.  Otherwise, GC will not be able to communicate with the device.

  • Download Settings - When adding a new device, choose from the three Download Settings options:

  • None - Download no existing settings from the new device.  Settings for the new device will be set manually within the GC application.

  • Download IP Link® Settings - If the new device previously existed on a network and was configured using GC software, use the Download IP Link Settings option to bring in the existing device IP settings when it is added as a new device to the current network.

  • Download Device Configuration - If the new device previously existed on a network and was configured using GC software, use the Download Device Configuration option to bring in the existing device configuration settings when it is added as a new device to the current network.

  • Auto Configure IP Address - This option automatically assigns an IP address to the new device.

To use the Auto Configure IP address option, the following rules apply:

  1. The new device must physically exist on the AV network.

  2. The new device IP address must be at the factory default (192.168.254.254).

  3. You must know the MAC address of the new device.  All Extron products have a MAC address label, usually visible from the rear of the device.

After adding a device, save the project file.

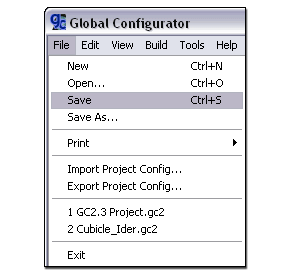
Saving the Project File

  1. From the File menu, select Save.

 - or -

Click the Save icon on the toolbar.


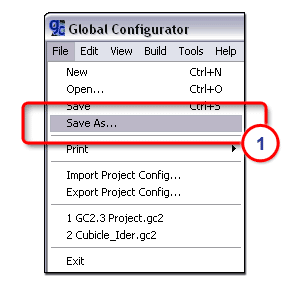
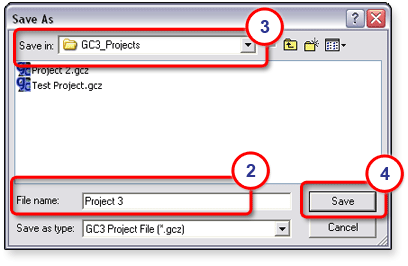
You can also use the Save As option to save the current Global Configurator project file with a new filename, in a new location, or both.

To save the project file as...:

  1. From the File menu, select Save As.  The Save As dialog box opens.


  1. Enter a unique project filename.

  2. Browse to the location where the new file is to be saved.

  3. Click Save.